


Get to know your bus route
Check out this guide for tips on using Community Transit's online Maps & Schedules
Our Maps & Schedules tools can help you find a ride with full route maps and complete bus schedules to help with your trip planning.
On this page: Getting started | How to find a route | How to navigate a route schedule | Route page features | More features
Getting started
Get started with your search from the Maps & Schedules index page:
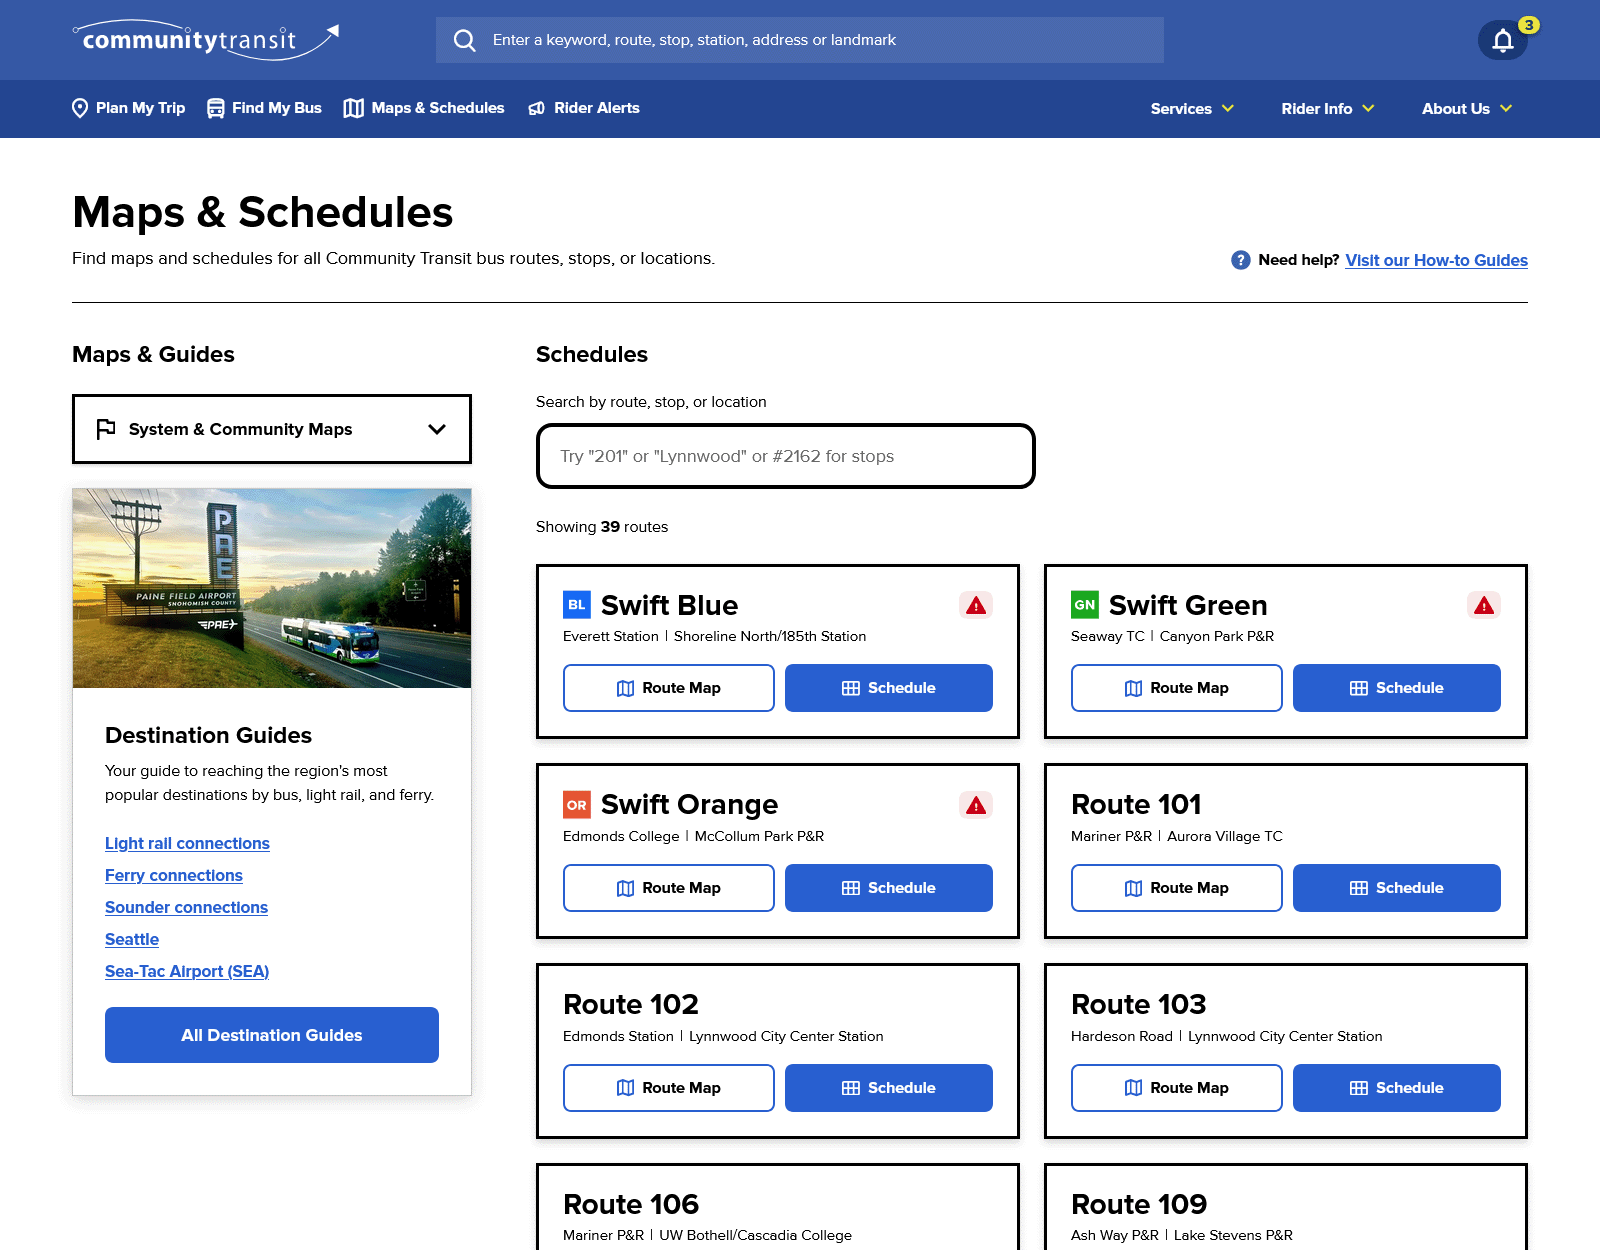
From here you can start looking for the information you need. Our full route list is displayed by default.
Under Maps & Guides, you can find additional helpful links to our most popular Destination Guides. Using the drop-down menu you can also view and download our entire system map, or maps showing all routes for specific communities in our service area.
 Back to top
How to find a route
Maps & Schedules has two main ways to search for a bus route:
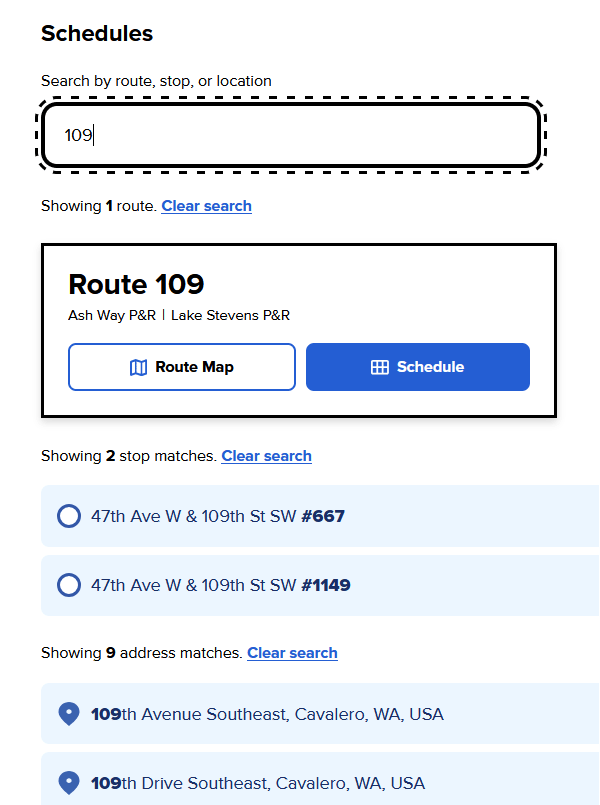
Search for a route
You can search for a route using the search bar. If you know your route or stop number you can enter it here. You can also search using an address to see what route options are nearby.
When you search, routes will be shown first, followed by stops, and then addresses. Use the Clear search link if you need to start over and return to the full route list, or type your new search into the search bar.
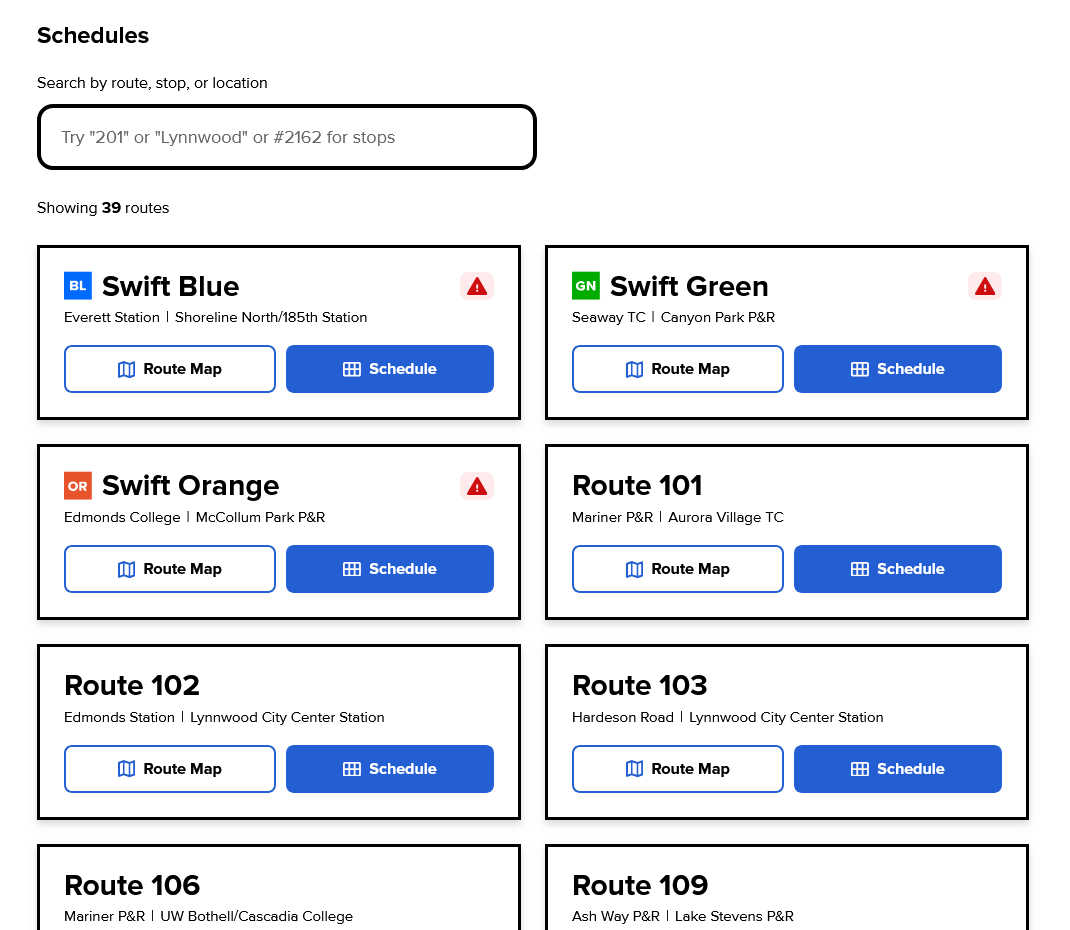
Browse our route list
If you don't use the search bar, you can explore our entire list of available routes by scrolling the page. The full list will be shown by default.
The Route Map button will pop-up a basic route map inside your browser to show a quick overview of where the route goes without leaving the page.
Click the Schedule button if you want to see the full schedule and timetable for a route. This will take you to a new page.
How to navigate a route schedule
Our route pages have a number of different features to help with your trip planning.
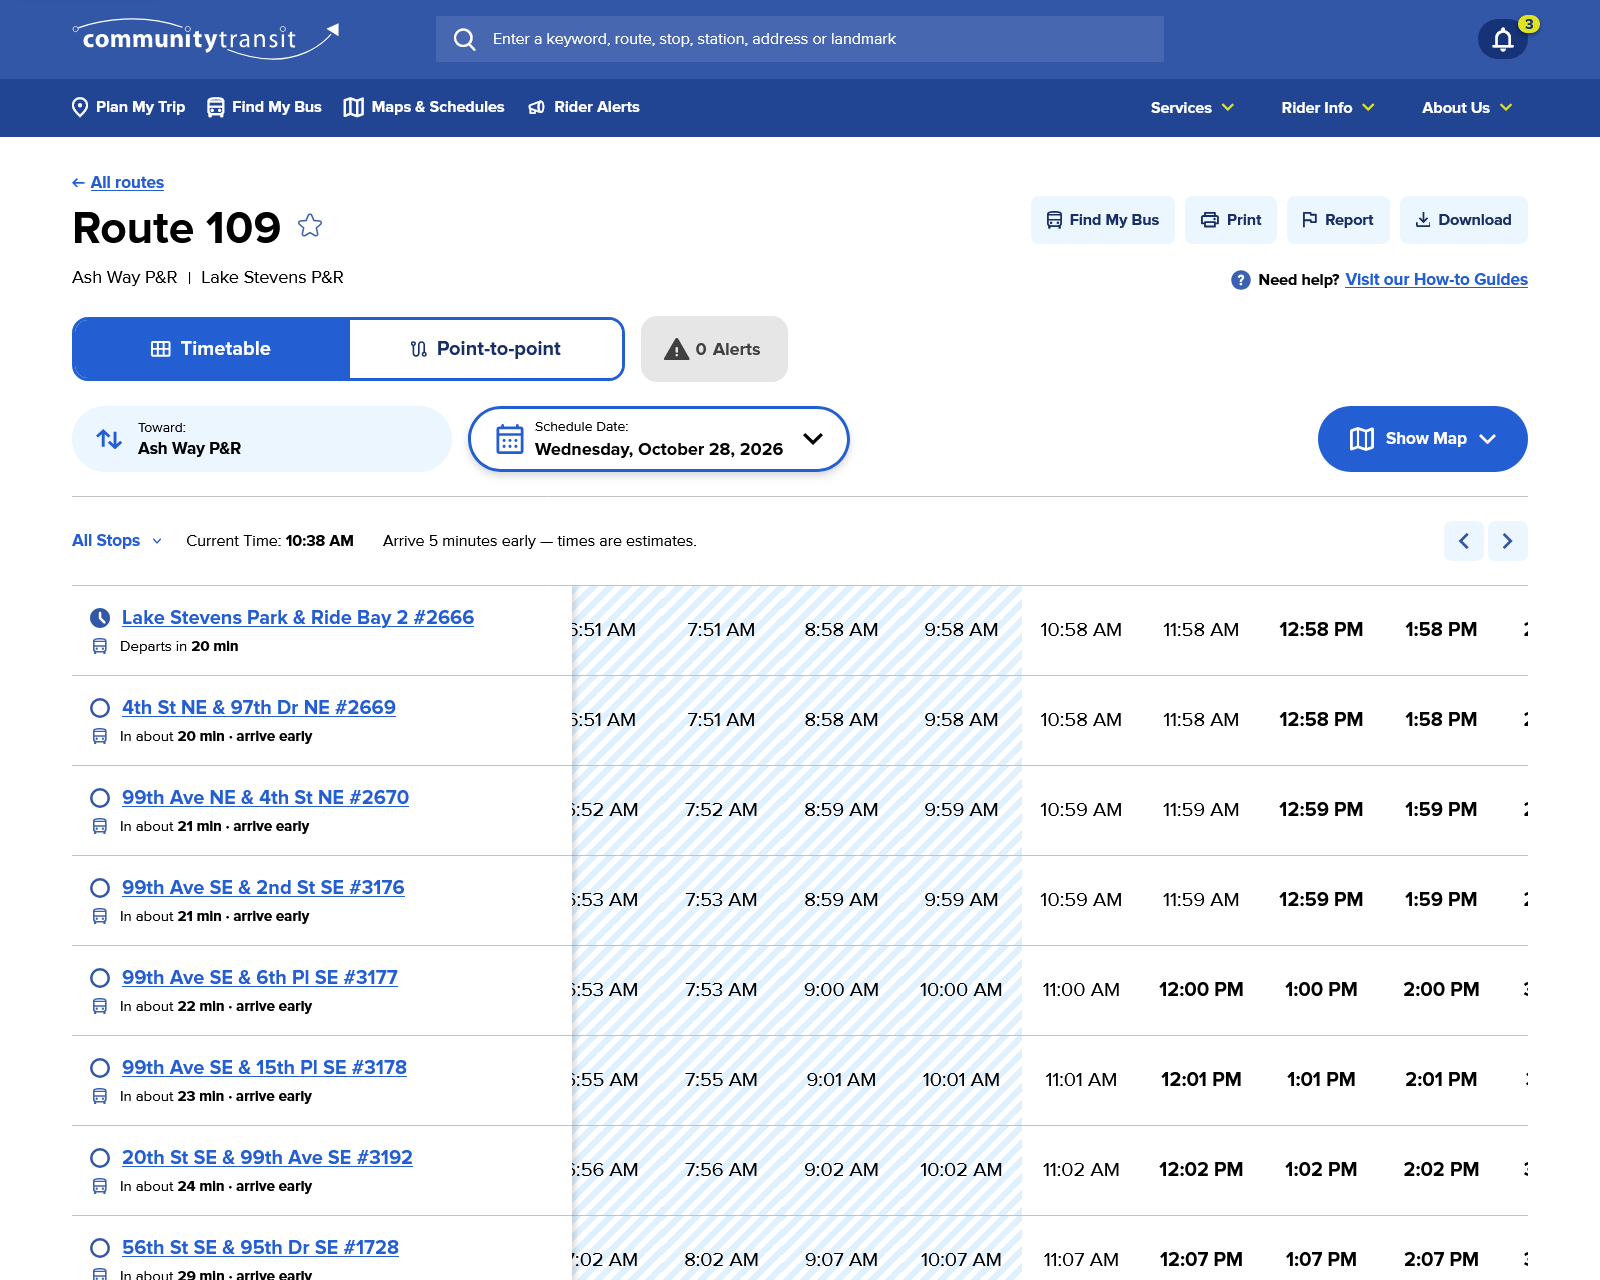
Above: an example of a what a route page looks like on a desktop browser.
You can immediately view the timetable to see schedules times for your selected route.
- Scroll up and down to see the list of stops for the route on desktop or mobile.
- If you're on a computer, scroll left and right to see the scheduled times for the stops lined up with the list on the left. When you first open the schedule, it will automatically display with the current times in the center.

The stop name and number is listed on the left. Clicking on this will take you to the associated stop page where you can see it on a map. Under the name you can see how long until the next estimated departure time at that stop.
To the right of the stop name is the table of scheduled departure times at that stop for the day. Times that are shaded with diagonal lines are ones that have already passed.
On a mobile device?
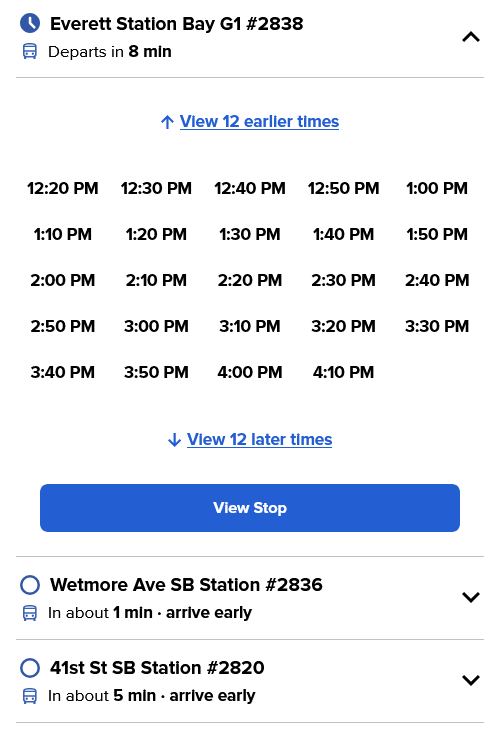
Schedules will look a little different when viewed on your phone. Scroll the list to find stops along the route, then tap on the stop to expand it and see scheduled times for that stop.
By default you'll be shown scheduled stops based on the current time. Use the links above or below the table to see earlier or later scheduled times for that stop.
Tapping the View Stop button will take you to the page for stop where you can see it on a map and see what other routes might service that stop.
Route page features
Use these features to located at the top of the route page to help you learn more about the route and plan ahead.
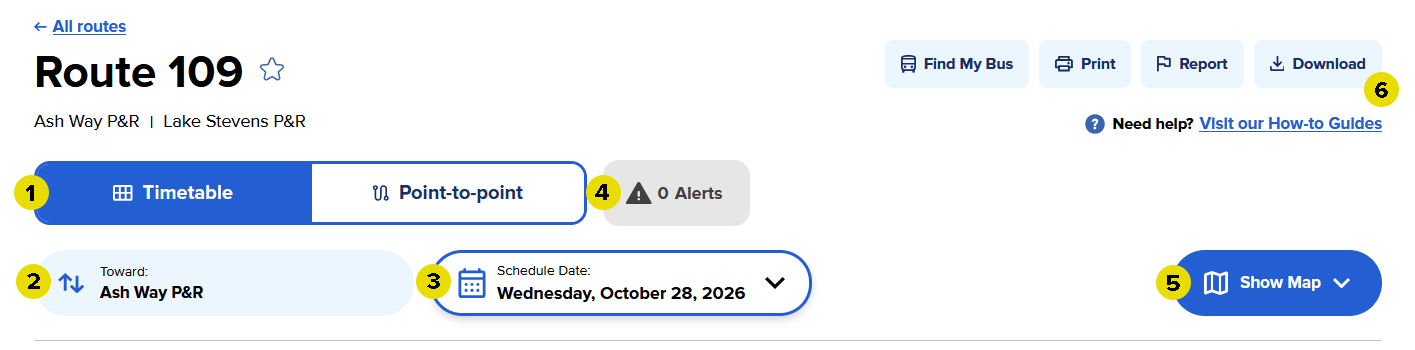
1. Switch between standard timetable or check point-to-point travel
By default you'll be shown the full route timetable for the route when you open the page.
If you already know what stops you'll be using during your trip, you can use the Point-to-point feature to assist with your trip planning. Clicking the toggle will change your page view:
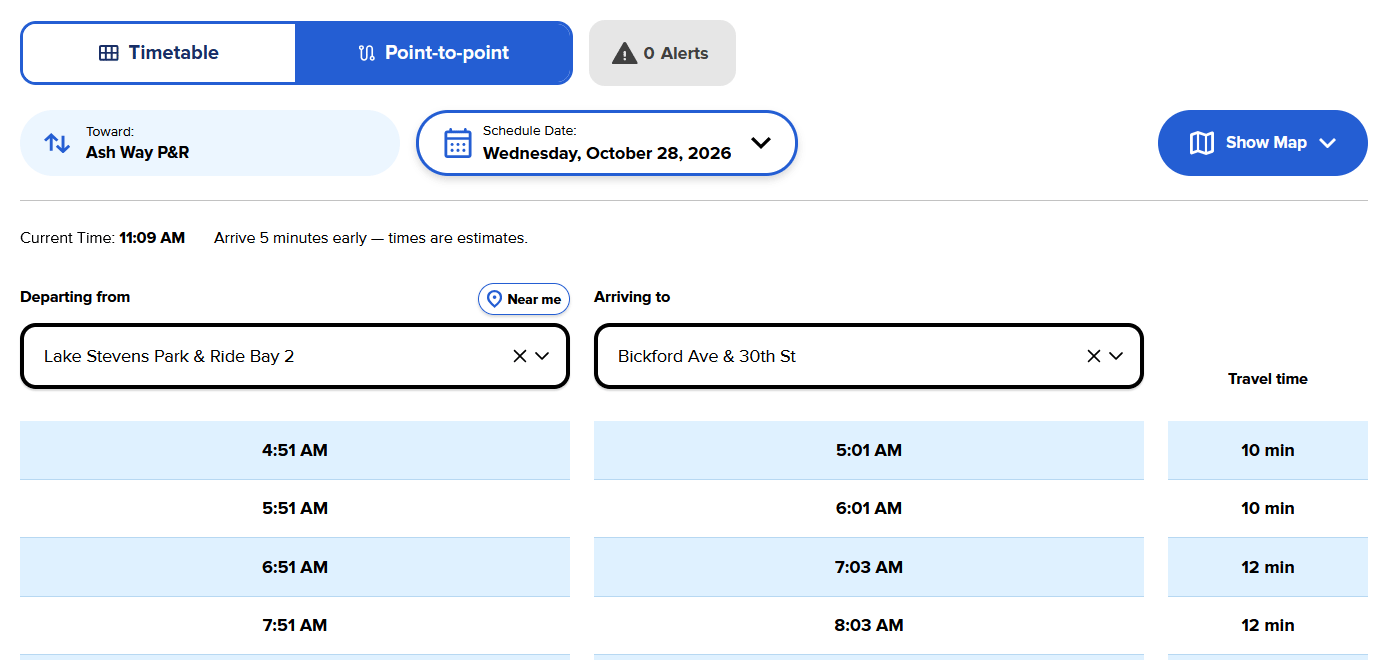
Choose the stop you plan to board at from the first drop down, or use the Near me button to find stops based on your current location. Then use the second drop-down to select the stop where you plan to get off the bus.
Once both stops are selected, you'll see the list of scheduled departure times, what time you'll arrive at your destination stop, and about how long the trip will take.
2. Change the route direction
Click the blue button with the arrows icon and final destination name to change the route direction and see schedules for trips going the opposite direction.
3. Set a travel date
If you're planning for a future trip, click this button to bring up a calendar and select the date for your trip. Schedules can change based on weekdays, weekends, or holidays, so if you're planning ahead make sure to set your date of travel to see the correct schedule.
4. Rider alerts
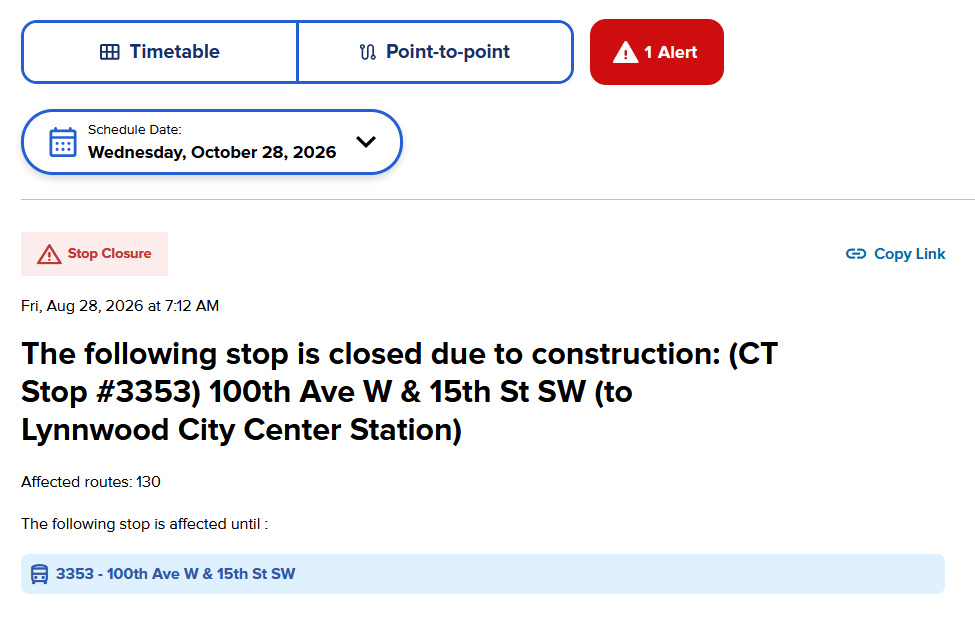
See if there are any active rider alerts for the route you are viewing. If this button is red, that means one or more alerts are active and could have an impact on your ride. In that case, you can click the button to view current alerts and learn more:
5. Check the route map
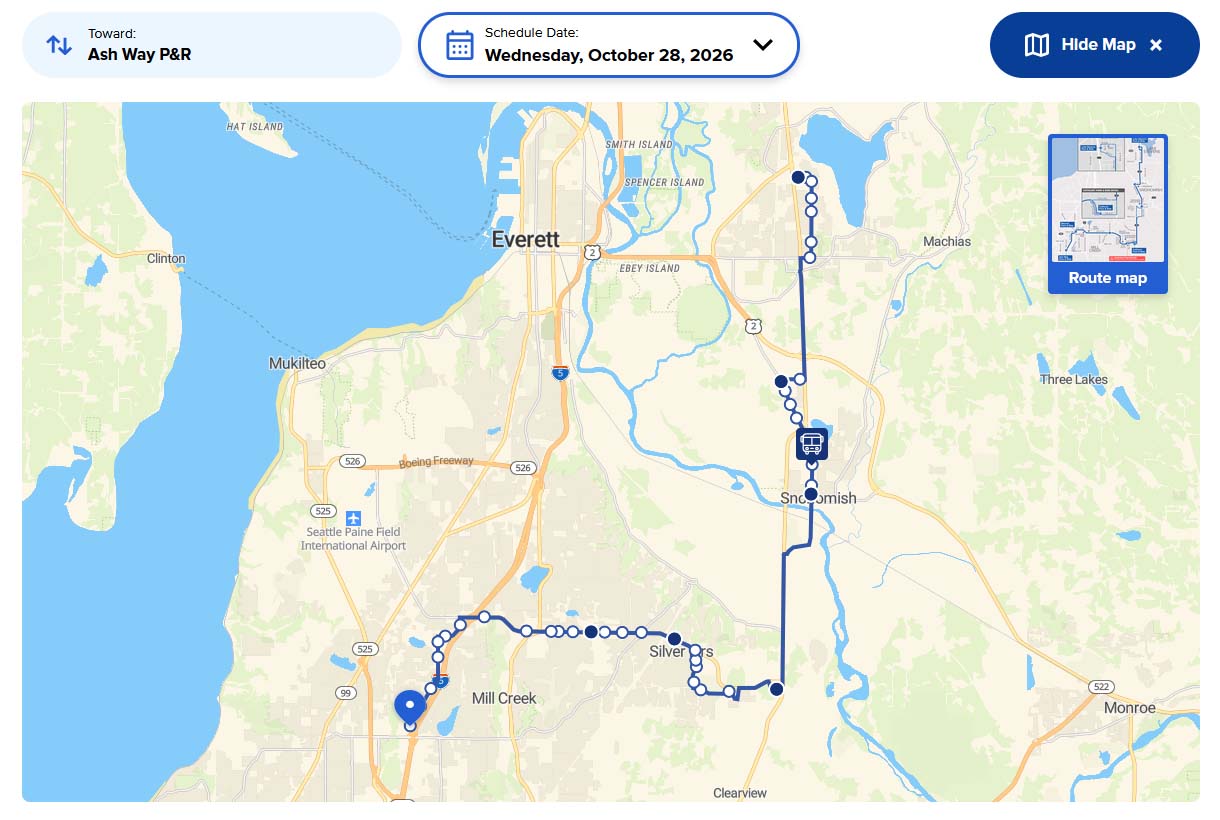
The Show Map button will open a real-time route map between the top part of the page and the timetable. You can scroll and zoom this map to explore the route. The bus icon shows where buses are currently located along the route.
Clicking the Route map button in the top right corner of the real-time map will open the classic bus route map for a quick overview of the route.
Click on Hide map to close the map space.
6. Download and more
These buttons in the top right offer a few more additional options. If you're viewing the page on mobile, these options will appear in a menu linked to the three-dots icon in the top right corner.
- Find My Bus: this button will take you directly to the route in our Find My Bus tool, which shows real-time information about the route.
- Print: this feature will open an additional dialog box where you can configure a custom route schedule that you can print. Select or deselect which stops you want to include in your printout.
- Report: see something that doesn't look right or run into an error? Report it to us and we'll look into it.
- Download: Download a PDF version of the schedule for the route you're currently viewing.
More features
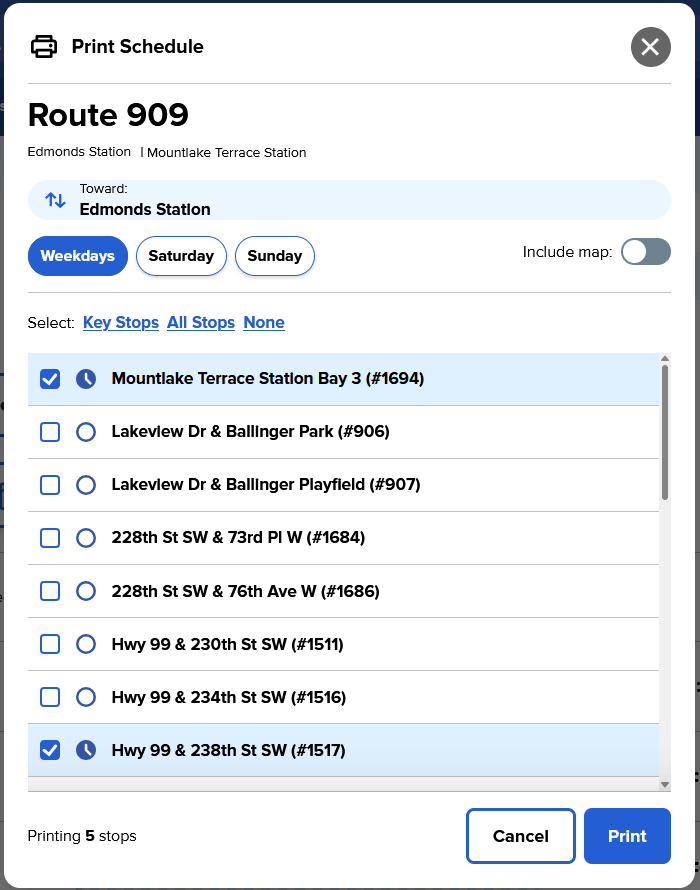
To print or save a customized schedule, click the Print button in the top right corner of the page. A menu will pop-up allowing you to choose your options before printing.
- Destination: Set which direction you're going to print by switching the destination in the blue area under the route number and name. Click on the destination to change directions.
- Day of the week: Use the buttons under the route destination to choose to print the schedule for weekdays, Saturdays, or Sundays, as schedules will vary for each.
- Select Stops: Check the boxes next to the stops you want on your printout. Or you can use the filters at the top to quickly select all or key stops.
When you first open up the print option all stops will be selected by default. Be careful, as for some routes this could mean a lot of sheets of paper! Consider choosing only the stops you frequent if you're using your printer.
- Include a map: Toggle the "Include map" option to add or remove the route map from your printout.
- Print or save: Click "Print" to use your device's print settings. Here you may also be able to save a digital copy of your printout as a PDF if your device supports the feature.
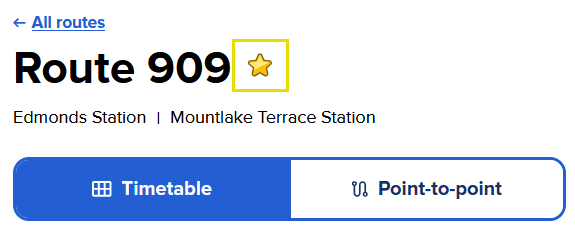
To mark a route as one of your favorites, just click the star next to the route number. When you've made a route one of your favorites, the star will be filled-in.
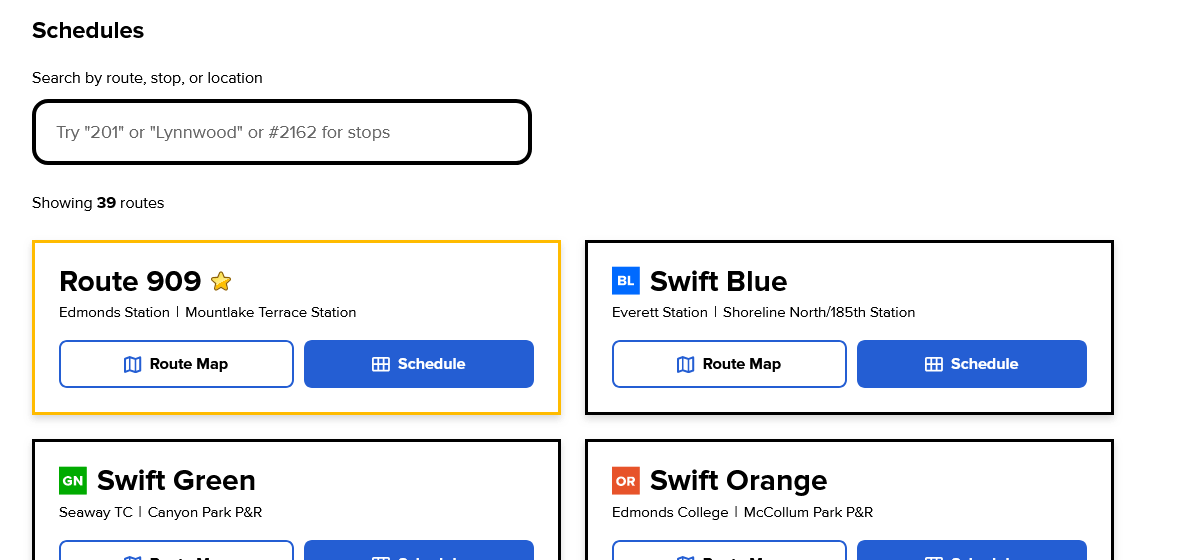
Routes that you have marked as a favorite will then appear at the top of the route list every time you visit Maps & Schedules, making them easy to find quickly:
FAQ
FAQ ideas:
- How accurate is the bus location data?

Still need help planning a trip?
Contact our Customer Care team for expert assistance. We can answer your questions, address concerns, provide personalized trip planning, and even supply printed route maps and schedules.
- Email us at riders@commtrans.org
- Call us at (800) 562-1375, (425) 353-RIDE (7433), or TTY Relay: Dial 711
- In person at the Ride Store: Monday–Friday: 7 a.m.– 6 p.m., Saturday 8:30 a.m. – 4 p.m.

How to use Plan My Trip
Planning your next bus trip has never been easier! Community Transit's trip planner simplifies travel in Snohomish County.
Enter your starting point, destination, and time to get custom routes, real-time arrivals, and transfer details. Tailor your trip and easily print or share your plan to stay prepared.
What is Plan My Trip?
Plan My Trip is our online trip planning tool. With it, you can enter in your starting point or current location, select where you want to go, and the tool will let you know what bus routes or modes of transportation will get you there with several different trip options to let you select the best one for your needs. Additional features let you customize certain aspects of your trip.
Welcome to Plan My Trip
When you first open the Plan My Trip tool, you'll see the trip planning input module in a light blue box, and a map ready to display your trip results once you enter in your start and end points of your destination.
Getting started
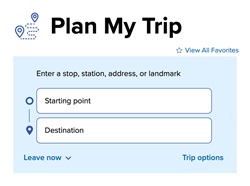
Step 1: enter start and end points
The quickest way to get started with planning your trip is to enter your trip's start and end points into the form fields. You may use addresses, transit stops, stations, or landmarks as points for your trip or use your current location from your location-enabled device.
Enter your trip's starting point into the top input field, and the end point into the bottom field.
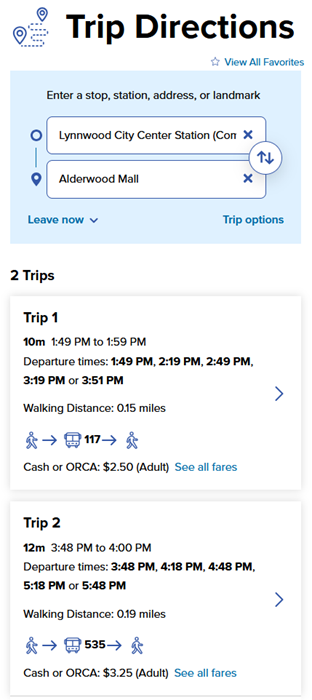
Step 2: view your trip options
Once you have entered valid start and end points for your trip, the Plan My Trip tool will display up to five different transit options to get you where you want to go.
Tips for trip planning results:
- Each trip will show a total travel time from point to point. These are estimates only, so make sure to plan for extra time if needed.
- Trip results can be sorted by travel time, walking distance, arrival time, or departure time using the drop-down menu at the top of the list.
- Up to five trip results will be shown, but some trips may have more options. Click the "Show more" link at the end of the list to see more trip options.
- Click on a trip to see a detailed breakdown of your transit options, what fare you'll pay, and see the route displayed on the tool's map.
- If you don't see any trips, make sure you correctly filled out the start and end points in the input fields. Make sure to select a search result when you start typing into the box. If your entry is incomplete the field will be highlighted in red and no results will display.
- Clicking the arrows button on the right side of the input fields will let you swap your start and end points for planning a return trip.
Step 3: See your detailed itinerary
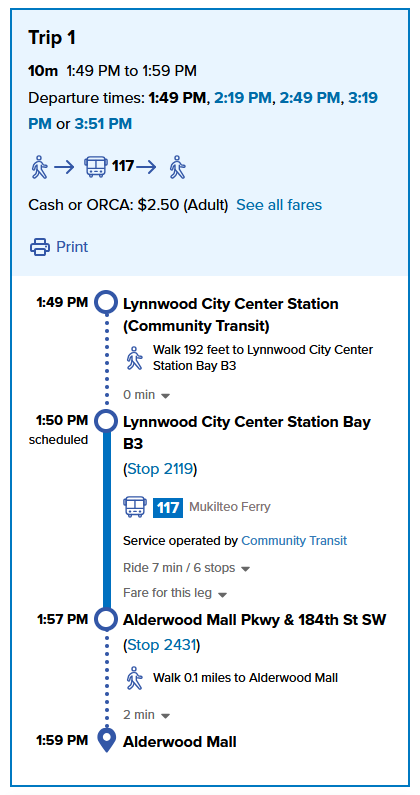
Click on one of the trips from your search results to see detailed steps of your transit options, what fares to pay, and print or save your trip for easy viewing offline. When you select a trip, the route will be displayed on the map.
Plan ahead with arrival or departure times
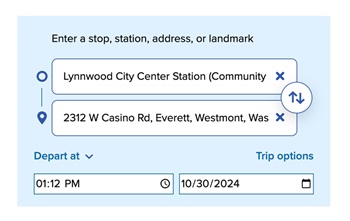
Not leaving right now? Plan My Trip will let you set a time and date for your trip so you can plan an upcoming trip or traveling at a certain time of day.
By default the tool will show you transit options if leaving immediately. To change this, click the "Leave now" drop-down menu and choose either arrival or departure time and enter in the time and date of your trip.
Choose your transit options
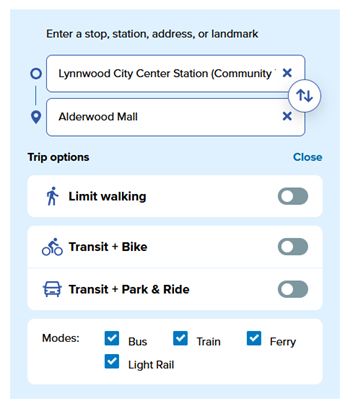
Tailor your trip for how you want to travel! Click the "Trip options" link to the open the menu.
- Select "Limit walking" to only show you the trips with the least amount of walking.
- Traveling by bike? Choose "Transit + Bike" to see your best options for combining biking with transit.
- Choose "Transit + Park & Ride" if you're planning on driving part of the way to one of the many Park & Rides in the region.
- Use the "Modes" check boxes to include or exclude different types of transit in your itinerary. Unchecking a box will exclude it from your trip results.
Step 4: customize your trip (optional)
Optionally, you may customize parts of your trip based on your needs.